Interior Wooden Parts - How to restore?

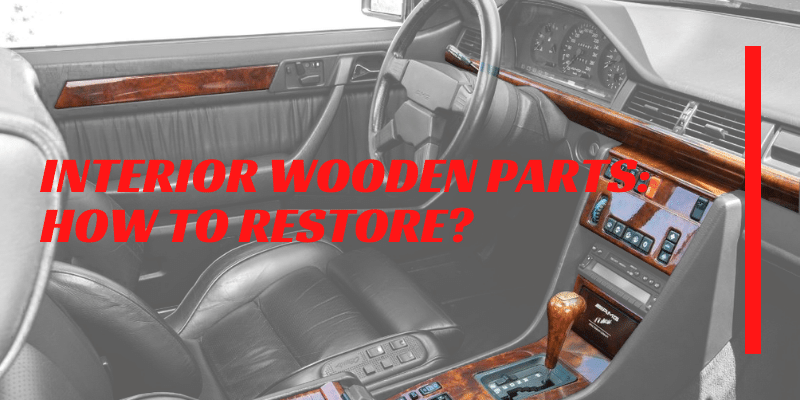
When we say classic vehicles, or especially when we think of classic mercedes cars, the huge wooden products used in the interior design of the vehicles come to mind. Particularly well-maintained and polished wooden parts create a feeling of high luxury in cars. However, a neglected wooden piece with many cracks can, on the contrary, spoil the entire appearance of the vehicle.
Today we will be talking about the wooden parts used in classic vehicles. We will take a look at how it is manufactured, how it should be looked after, and what to consider when installing, albeit briefly.

Wooden parts are perhaps the most difficult parts to find when performing classic car interior design restoration. Classic car interior restoration is not cheap. Because the production of the parts required for restoration is really difficult and requires very fine workmanship. Even 1 cm deviation in the screw holes on the produced parts may cause that part to become unusable. For this and similar reasons, classic car interior kits can often be considered the most important piece. For example; Most of the front consoles of Mercedes W107, W108 and W109 cars consist of wooden parts. Not only the front console, but also other parts such as the air conditioning control panel, center console, gear console consist of wooden parts.
Since most old wooden parts cannot be restored, these wooden parts must be reproduced in accordance with their original form. Production is carried out on the basis of colors, patterns and dimensions, remaining faithful to the original. Otherwise, the produced part may not be compatible with the car.
If we take a look at the interior wooden parts in general;
- Dashboards,
- vents,
- Center consoles,
- Climate control panels,
- Armrests,
- Trim,
- Steering wheels can be considered as the most used wooden parts.
How to restore wooden parts of classic Mercedes cars?
It is possible to restore old and cracked wooden parts. However, it requires serious effort. It is easy to care for the old and lost shine of the wooden parts and you can learn how to care for your wooden parts by following the steps below.
1 - Stripping furniture is chaotic, yet key to wooden part rebuilding, so work outside if conceivable. In the case of working inside, secure the floors and any other wooden parts close by and guarantee great ventilation. Apply stripper generously with an old brush.
2 - For a decent outcome while resurfacing wood, leave the stripper on for somewhere in the range of five and 25-30 minutes until the completion – a blend of old stain and finish – has broken down. The time allotment will rely upon the organization and thickness of the covering. In the event that the stripper hasn't eliminated every one of the layers simply re-spread the glue and it will keep on working.
3 - Neutralise the wood with a stack of steel fleece absorbed white soul or exclusive wax and finish remover, following the grain of the wood. Prior to utilizing any compound consistently read the mark cautiously as various strippers require distinctive neutralisers. Inability to kill stripper can permit it to reactivate and your wood reclamation may not go to design.
4 - The subsequent stage to refinish wooden part is to wipe away residues with cotton rags and leave for 24 hours. Meanwhile clean away dirt and polish dirts elsewhere by applying wax remover to a steel wool pad or coarse cloth and working in small areas at a time. Leave for a couple of moments to the wax and wipe away with a spotless fabric before it hardens.
5 - 1 day after stripping the wooden parts, use a sanding block and very fine glasspaper to smooth over the wood fibers raised during the stripping process – work with the grain. Shake and vacuum the protective sheet to get rid of dust that could spoil the finished piece. Finally wipe with a tack cloth.
6 - At the point when you restoring classic car wooden parts, you'll notice that each piece is diverse to handle. Here for example, for a long time the wooden part was sited underneath a window and the sun has blanched piece of the wood, so applying a ebony wood color will make the main a uniform tone. Apply liberally with a brush and permit mess to infiltrate; wipe away abundance with a fabric. Guarantee an even wrap up by working in a decent light.
7 - When wooden car part dry, apply a layer of completing oil utilizing a brush or build up free material. Permit oil to infiltrate for 10 minutes and wipe away the excess before it goes tacky. sit tight for at any rate 4-5 hours and delicately rub with 0 check steel fleece prior to applying a further coat; rehash – the more covers the more prominent the sturdiness and sheen.
8 - At long last, sparingly apply a flimsy layer of good wooden wax over the entire part. Leave for an hour at any rate and clean with a build up free fabric. To abstain from distorting brought about by drying out of the wood, position furniture away from radiators and flames. Daylight will dye the wood, so guarantee it's anything but positioned underneath a window.
How can I repair large cracks in wooden parts?
There are many different methods available for removing cracks. However, we would like to share the 3 most used methods.
- Wood dust and glue,
- wooden putty,
- Epoxy.
The above three methods are the most commonly used wood repair methods. The application method of almost all of them is the same, but paint is required in the Epoxy method. The method we recommend is Wood dust. After applying these 3 methods, wood renewal should be done on the repaired area.
Where can i find the classic car wooden interior parts?
Bamboli LTD and as a classic mercedes car enthusiast; We produce many classic car wooden interior parts. While producing the parts, we use high quality materials and reveal handcraft with machine-sharp dimensions. We strive to make your classic cars look like they left the factory, by staying true to their original colors. In addition to our existing products, we make special production for your desired vehicles and for your special projects.
Bamboli LTD.
-
Posted in
Classic Mercedes


